What are the precautions for PE water supply pipes
What are the precautions for PE water supply pipes?PE pipes have good flexibility and light weight, so long pipelines can be prefabricated on the ground. When geomorphic conditions permit, ground welding of pipelines can reduce the trench excavation width. The minimum width should be suitable for easy installation and docking.
1.2 In the pipe trench of sand or silt, if it is not easy to make an upright pipe trench side wall, a slope of 45 ° or capable of supporting the material of the trench wall can be made. If the trench is wide, the initial landfill material must be tamped to support the final weight of the landfill.
1.3
The minimum thickness of the pipe top soil buried in the PE pipeline is: ① The buried depth of the pipe top buried under the carriageway should not be less than 0.9 meters; ② The buried depth under the sidewalk or the pipe branch should not be less than 0.75 meters;
Shall not be less than 0.6 meters; ④ In permanent frozen soil or seasonal frozen ground, the buried depth of the pipe top shall be below the freezing line. ⑤ When the crossing roadway cannot reach the design depth, measures should be taken to lay steel casing for protection.
2. Pipeline connection
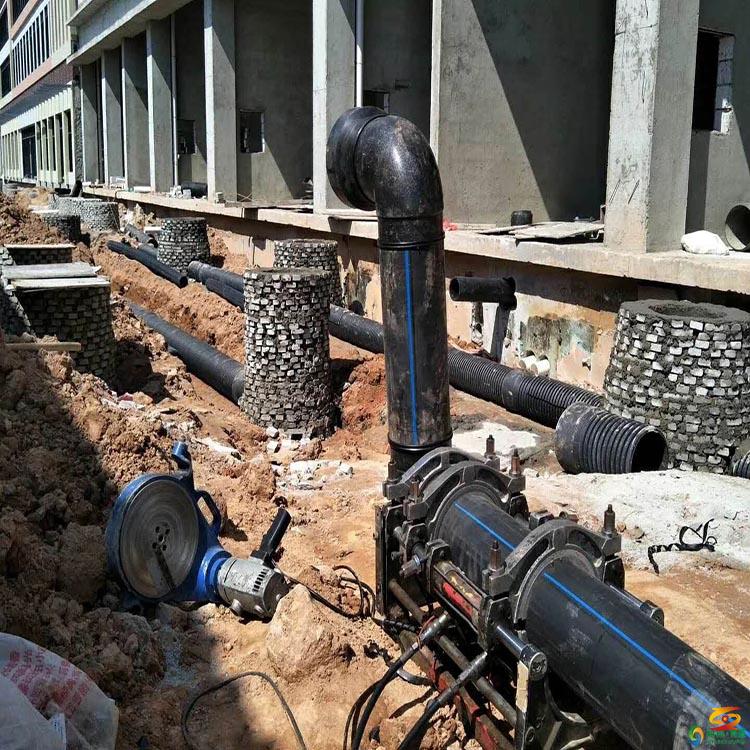
Check the pipe and clean the pipe end → tighten the pipe → mill the pipe end with a cutter → check the pipe end misalignment and gap → heat the pipe and observe the minimum curling height → weld the pipe and cool to the specified time.
During the welding process, the operator should refer to the parameters of the welding process card for operation, and if necessary, according to the weather,
Ambient temperature
And other changes to adjust it appropriately:
(1) Check whether the specifications and pressure level of the pipe to be welded are correct, and check whether there are knocks, bumps, or scratches on the surface. If the concentration of the scar exceeds 10% of the pipe wall thickness, it should be partially excised before use;
(2) Use a clean cloth to remove oil stains or foreign objects from both ends of the tube;
(3) The welded pipe is to be placed in the frame card, so that the length of the two ends protruding is equivalent to the outside of the pipe frame, use the support bracket, so that the pipe axis is at the same height as the center line of the frame, and then use the slip to tighten Solid
(4) Insert the milling cutter, turn on the milling cutter power switch, then close the ends of the pipe, and apply appropriate pressure until continuous chips appear on both ends (chip thickness is 0.5 ~ 1.0mm, through adjustment
Milling insert
The height of can adjust the thickness of the chip), remove the pressure, wait for a while, then retract the movable frame and turn off the power of the milling cutter;
(5) Take out the milling cutter, close the ends of the two pipes, and check
Justified
The situation (the misalignment of the two ends of the pipe cannot exceed 10% of the wall thickness, which can be improved by adjusting the straightness of the pipe and the elastic slips; the sound quality gap at both ends of the pipe cannot exceed 10% of the wall thickness, otherwise it needs to be milled again until the above requirements are met );
(6) Clean the dust and residue on the surface of the heating plate (you must pay special attention not to scratch the non-stick layer on the surface of the heating plate), check whether the temperature of the heating plate reaches the set value;
(7) After the temperature of the heating plate reaches the set value, put it into the rack and apply the specified pressure until the most water curling on both sides reaches the specified value (0.1 × pipe wall thickness + 0.5mm);
(8) Reduce the pressure to the contact pressure and continue heating to the prescribed time;
(9) After reaching the specified time, withdraw the movable frame, quickly remove the heating plate, and then close the two tube ends, the time interval is as short as possible, and the longest can not exceed the switching time; after cooling the specified time, release the pressure and release the card Tile, remove the connected pipe. The welding method of the three-way, four-way and reducer (with special size head) of the pipeline is the same as the above.
(10) After the heating is completed, the butt heating plate should be quickly detached from the parts to be connected, and the joints of the two to be connected should be tightened with uniform external force to form a uniform flange and smoothly transition to the pipe body. The flange width is 5-8mm and the height is 3-5mm. After holding the interface and cooling for 36 minutes, remove the fixture and check the interface quality.
(11)
Hot fusion welding
Construction notes: a. The operator must pay attention to follow
Technical specification
And welding process parameters; b. The cooling time of the welding port can be shortened appropriately, but it must be fully cooled; c. During the cooling of the welding port, it is strictly prohibited to apply any external force to it; d. After each welding is completed, it must be appearance Inspection, if it does not meet the requirements, the rework must be cut off.
3. Pipeline laying
3.1 General requirements: (1) The minimum thickness of the top soil of the pipe is at least below the soil freezing line, and not less than 0.8m; (2) The bending radius of the pipe is not less than the allowable
Minimum bending radius
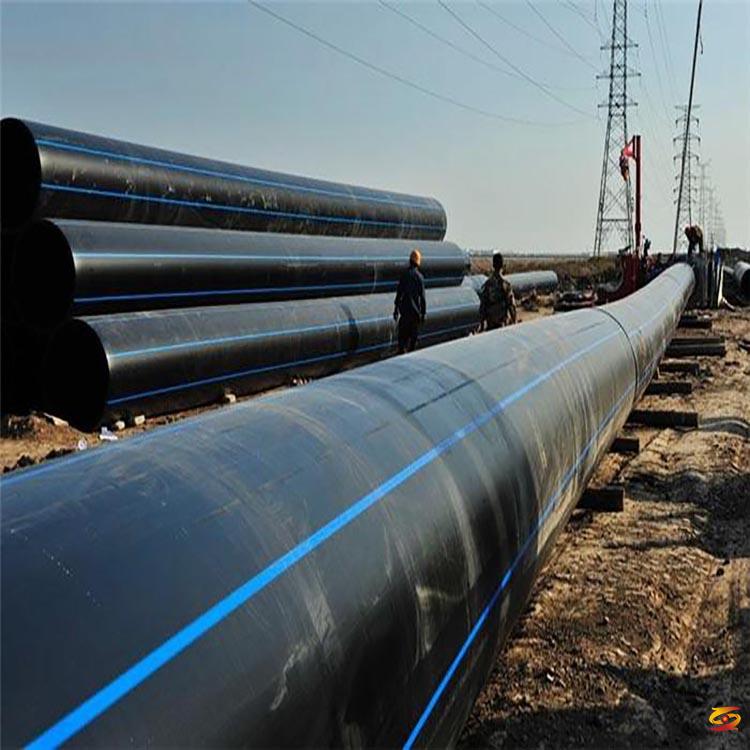
; (3) When laying, you can make full use of the good flexibility of PE pipes, connect them on the ground into a certain length (not more than 100m) of pipelines, and then lay them directly.
3.2 When the diameter of the pipe is greater than 315mm, it is laid manually with a crane. When the diameter of the pipe is not greater than 315mm, it is laid manually.
3.3 The PE pipeline can only be laid after the trench bottom elevation and pipe trench foundation quality inspection are qualified.
3.4 Laying of PE pipes. Rely on its own flexibility to overcome temperature stress, but its bending degree can not exceed its allowable bending radius.
3.5 When laying PE pipes, prevent scratches, twists or excessive stretching and bending.
5. Piping test
After the pipeline installation is completed, the strength and tightness test should be carried out.
Water supply pipeline test, in order to ensure the safety of water supply pipeline water pressure test, the following work needs to be done.
5.1 Preparation before the test
5.1.1 Back installation:
According to the size of the total jacking force, reserve a section of trench without digging, as the back (the poor soil or low-lying section can be used as artificial back). The supporting area of the back wall should be determined according to the soil quality and test pressure.
Consider 15t / m2 pressure. The back wall should be perpendicular to the centerline of the pipe, and a row of toads should be placed next to the back wall. Before the beam, stand
3 to 4 large togsaws or jack iron, and then use a jack to support firmly. The jack used for pressure test must be stable, straight, and solid. To prevent accidents caused by eccentric pressure. It is strictly forbidden to use oil leaking jacks. If you find your back during the pressure test
When there is obvious walking, you should immediately reduce the pressure for maintenance, and repair under pressure is strictly prohibited. Before the pressure test of the pipeline, in addition to the top of the support, backfill more than 1/2 pipe diameter with soil on both sides of the middle of each pipe, and set up a branch at the tee of the elbow and branch line
Pier to prevent pipe displacement and accident during pressure test.
5.1.2
Exhaust: According to the longitudinal section of the pipeline, all high points should be equipped with an exhaust valve, so as to adapt to the requirements of exhausting e799bee5baa6e79fa5e98193e58685e5aeb931333433616233 gas during irrigation The pipe plugs at both ends should have two holes, the upper hole is used for exhaust and pressure test, and the lower hole is used for water intake and discharge.
Water. Exhaust work is very important. If the exhaust is poor, it is neither safe nor easy to ensure the pressure test effect. It must be noted that the high-pressure pump used must not be installed directly in front of the pipe plug to prevent accidents.
5.2
Pressure test includes: ① Relevant regulations for pressure test: The length of pipeline pressure test in sections is generally not more than 1000m, and the test pressure is 1.1Mpa according to the design requirements. ②Pressure test: the back of both ends of the pressure test section and the pipe plug, the first connection
When you are stressed, you need to be very careful. There must be full-time personnel to monitor the working conditions of the pipe plugs and backs at both ends. In addition, there must be a person to contact back and forth to stop the pressurization and treatment in time to find the problem and ensure the safety of the pressure test. During the pressure test,
Step-up pressure, do not pressurize too high at one time to avoid accidents. Observe and check immediately after each pressure increase. After no problems are found, continue to increase pressure and gradually increase to the specified test pressure.
If there is any interface leakage during the pressurization process, the pressure should be immediately reduced and repaired to ensure safety.
6. Pipeline backfill
Pipeline backfilling should be done after the pipeline is installed, after the pipeline foundation is completed and the mortar strength of the well chamber reaches 70% of the design number. Backfilling is carried out in two steps: fill both sides and the top of the pipe 0.5m first, and leave the joints aside, wait
Hydraulic test, pipeline installation, etc., then fill the rest. Backfilling should be carried out symmetrically and in layers, each layer is about 30cm, compacted as required to prevent displacement, and measure the degree of compaction layer by layer.
If you want to know more about it please do not hesitate to
contact me. WhatsApp:+86-15966835076.
