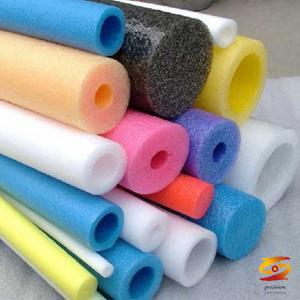
Production process of plastic rod
Production process of plastic rodMethod / Step
1
(1) Driving
1. Before Starting machine, the extruder and the machine head are generally in two states: one state is that the interior does not contain plastics, such as hard polyvinyl chloride, the machine, the screw, and the machine head have been removed during the last stop At this time, as long as the temperature of each part reaches the specified value, you can drive immediately. The other state is that the interior contains plastics, such as polyethylene or polyamide. When the machine was last stopped, the machine head was not cleaned. The barrel, screw, and machine head all contain some plastic. When the temperature reaches the specified value, it needs to be kept warm It takes 30-45 minutes for the plastic to melt completely before driving. Otherwise, as soon as the temperature is reached, driving will cause excessive resistance, damage to the screw and equipment, abnormal discharge, etc., making the operation impossible.
2. "Hunger method" should also be adopted for feeding while driving, that is, a small amount of raw materials are gradually added to the hopper. When the plastic bar is seen to squeeze out, the raw material can be poured into the hopper and filled to allow the bar to continuously extrude.
3. When the bar is drawn out and driven, the bar is just out of the cooling sizing die, and there is a distance from the brake device, and no resistance can be applied. In order to make the extruded rod without gaps and not become waste, the extraction device shown in Figure 6-8 should be used when driving.
2
The lead-out device is a rigid polyvinyl chloride pipe with an outer diameter equal to the inner diameter of the water-cooled sizing die, and one end of the hard pipe is connected with a bolt and a threaded metal rod. Before driving, insert the threaded end of the metal rod into the cooling sizing die, replace the rod with a hard tube, and clamp it into the braking device. After driving, the molten plastic enters the cooling sizing die through the machine head and condenses on the metal. On the rod, a rod material is formed, and the metal lead-out rod is pushed out from the cooling and sizing die. When the rod material passes through the braking device, the lead-out device can be taken out.
3
4. When the bar reaches the specified length, open the cutting machine to saw the bar.
(2) Quality inspection
The external dimensions of the bar can be measured with calipers, the roundness can be directly observed with the naked eye, and it is more difficult to check whether the inside is solid.
According to the bar appearance and internal quality gun check, if problems are found, timely adjust the process operating conditions to make the quality meet the requirements.
(3) Parking
1. Stop the feeding, when the screw at the feeding port is exposed, the temperature of the extruder and the head can be gradually reduced. It takes more than one hour for the "feeding" of the central melting zone of the large-diameter bar, so the electric heating cannot be turned off immediately.
2. Clamp the brake device more, increase the resistance, and reduce the screw to the minimum speed, so that the remaining molten material extruded by the screw is continuously filled into the center part of the bar to compensate for the solidification and shrinkage of the bar after recording Materials, otherwise, there will be countless tiny gaps in the center of the last part of the bar, which is "white core" and scrapped, as shown in Figure 6-9.
3. When the material is squeezed out and the bar does not move forward, the temperature of each part can be turned off, the screw can be stopped, and the cooling water can also be turned off. Let the bar cool naturally.
If you want to know more about it please do not hesitate to
contact me. WhatsApp:+86-15966835076.
